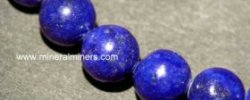
Stretch Bracelets: Not Just for Kids & Plastic Beads Anymore!
Almost every fashion jewelry designer out there seems to be offering a line of sophisticated, layered stretch bracelets. Stretch bracelets have grown up and can be found sporting all kinds of gemstones, fancy beads and pearls. They are fun and simple to make and much less fussy to construct than other types of bracelets. However, there are some secrets to creating chic and stylish stretch bracelets that won’t fall apart. I am going to share some of my tips on that will stay together and last a long time.
Materials Needed to Make Stretch Bracelets
1. Stretch Cord Some of the common brands include Stretch Magic, Powercord and Opelon. Many of the Jewelry and beading supply companies seem to have their own brand name and at least one brand can be found at your local craft store. As with all stringing materials they come in different mm thicknesses. For most of my stretch bracelets I like to use a .5mm or a 1 mm thickness. They knot easily and fit through most of the holes in the beads I like to use. If you are using particularly heavy beads you can use a thicker cord because the holes usually get a little more generous in bigger beads. Keep in mind, the thicker the cord, the more it it will cost you.
Yes – obviously you need beads. The great thing about stretch bracelets is that you can be more random in your pattern or make multiples of them to layer together and they always look great so it is a nice way to use up odds and end beads you have from other projects. I don’t recommend using rough beads like lava beads, maybe some coral or crystals on thinner stretch cord as they can cut their way into the cord and weaken it over time.
3. GS Hypo Cement I use GS Hypo to put a little dab of glue on my knot in my bracelet to add extra strength. It is intended to glue non-porous materials and the tiny precision applicator makes it easy to get the cement right where you need it.