Polymer clay beads Necklace
Related posts:
Related posts:
 This American flag is easy to make with kids and it s a fun way to use beads. It also makes a cute patriotic refrigerator magnet in honor of July 4th. My daughter…
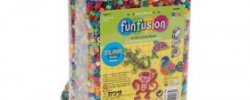 Have you and your kiddos discovered Perler Beads yet? They are one of my girls favorite things to pull out during down time. We got an 11, piece bucket of beads…
 What inspired you to launch Fashion Colorworks? I noticed that among the few bead competitions, there are no truly international contests accessible to artists around…
 Rated 3.7 out of 5 by 3 reviewers. Rated 5 out of 5 by jessabo Simple and elegant! I was decorating for an elegant bubbles and brews birthday party and I needed…
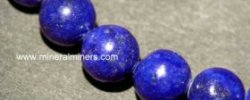 The even, deep blue color of this lapis lazuli cabochon is rare and highly prized by connoisseurs. Lapis lazuli is treasured the world over for its beautiful deep…